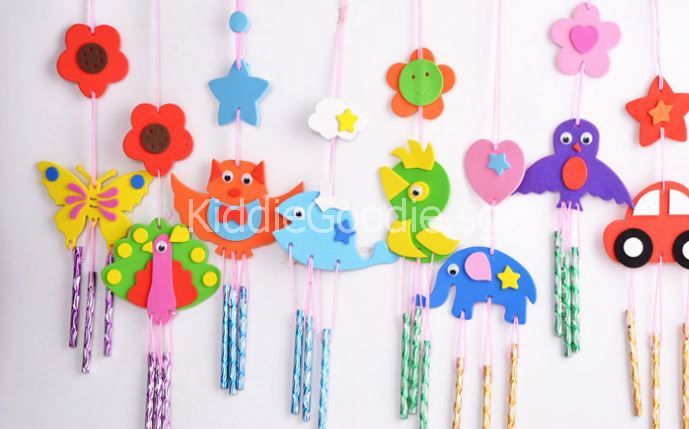
DIY Windchime - Nostalgic Ornament

When we think of Windchimes, somehow we will think of a distant memory in childhood or a feeling of reminiscence - that we have somehow had one like that at home in our childhood days. The bigger metallic ones that will clink and clank with the breeze that gently breaks the silences of our homes when we were enjoying a peaceful idyllic day at home in days gone by. Hung by the windows, it was quite therapeutic to watch it when I was younger as the windchime was buoyed by each gust of wind with the billowing curtains in its background.
Won't it be nice to introduce windchimes to our little ones too? To allow them to stop for a moment, put down their electronic devices and start interacting and connecting with you, creating something that they can use as an ideal ornament at home, attaching to it the beautiful core memory of you creating it with them so that each time they look at it flying with the winds at the window, warm fuzzy feelings of home and love fill their hearts.
This easy-to-make windchime is perfect for little hands, for children who enjoy sticking and pasting foam art. My 5 year-old love this and was absolutely thrilled with the windchime after she completed it.
This product measures 9L by 9.5W cm (packaging) and is ideal for birthday goodie bags. It is a popular addition to these party packs as they are so special and the completed craft is beautiful. They are available in 8 unique designs - Orange Owl, Purple Bird, Car, Elephant, Whale, Peacock, Butterfly, Green Bird.
Some step-by-step instructions for the windchime:
Step 1: Paste the EVA Foam pieces to create the animal (this step is easy - children can do it themselves)
Step 2: String the metal tubes with the foam pieces. (requires some adult assistance as it may be difficult to string it through the tube holes. A tip here is to use the plastic needle given to enlarge the holes in the tube prior to stringing. If there is still difficulty in stringing, try cutting a piece of scotch tape and stick it to the end of the string, making it pointed for easy insertion of the string through the metal tubes. Alas, the needle provided is too big to string through the metal tube hole).
Step 3: String the foam pieces together! (children may use the plastic needle to do this)
You're done! Here is a simple video for some visual instructions:
Hope this information is useful to you in the creating of the Windchime!
Level of Difficulty: Medium
Most Difficult Part of the Craft: Stringiing of the metal tubes and foam pieces.

